pytest 单元测试
概要: 在Python中使用更加易用强大的pytest进行单元测试
创建时间: 2022.10.02 23:28:48
更新时间: 2023.07.28 22:41:47
Python测试
测试步骤
大多数测试基于 Arrange-Act-Assert 的AAA模型,即
- 第一步 Arrange,或者叫 setup,目的是准备测试条件
- 第二步 Act,通过调用某些函数和方法进行动作
- 第三步 Assert,即通过断言第二步的动作的执行结果与预期结果的关系,进行测试结果判定
举个例子,来自Arrange-Act-Assert: A Pattern for Writing Good Tests | Automation Panda
| Python | |
|---|---|
unittest
unittest是Python自带的单元测试模块,典型的测试方法如下
| Python | |
|---|---|
| Bash | |
|---|---|
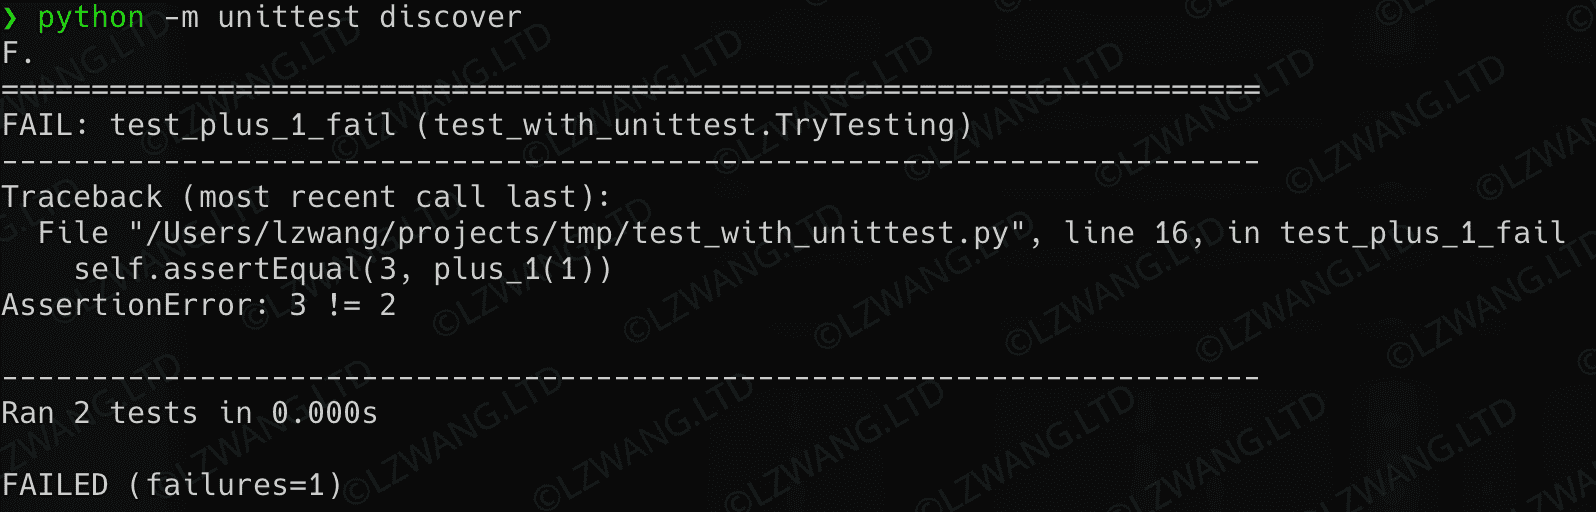
可以总结使用
unittest编写Python测试用例的流程如下
- 导入
unittest.TestCase类,并继承 - 在继承类下编写测试方法
- 使用
self.assertXXX方法来进行测试断言
Python自带的unittest中断言方式有很多种,如下所示
但是如果测试一个纯方法,而不是类方法,还要继承unittest.TestCase 类,显得有些多余
pytest
安装/升级pytest
| Bash | |
|---|---|
| Python | |
|---|---|

pytest配置
配置文件
pytest的配置文件共分为以下几种
pytest.initox.ini(可参考tox文档)setup.cfgpyproject.toml(pytest 6.0+)
除去 pyproject.toml 外,其余三个配置文件格式与 ini 文件类型基本一致
pytest测试
raise
一个简单的测试用例,捕获意料中的异常,参考 How to write and report assertions in tests — pytest documentation
| Python | |
|---|---|
fixture�s
pytest中的fixtures的特点是明确、模块化和可扩展的,主要用于为测试用例提供必要的上下文,可以实现诸如mock依赖方法和数据的功能。
fixtures的详细说明参考 About fixtures — pytest documentationfixtures的详细使用参考 How to use fixtures — pytest documentation
下面举例使用fixture机制来复用测试数据
pytest.caplog可以对Python自带的logger或者loguru的logger进行测试,详见 DahlitzFlorian/pytest-loguru-support-video-snippets
marks
pytest中的marks用于为测试方法注入元数据(如测试数据,但不会mock对象),然后被fixtures或者插件调用,它可以实现诸如过滤警告信息、参数化测试、条件跳过测试方法、期望测试方法失败等功能。
marks可用类型请参考 API Reference — pytest documentationmarks使用方法请参考 How to mark test functions with attributes — pytest documentation
此处举例使用 pytest.mark 进行参数化测试
durations�
找出运行较慢的测试用例,参考 How to invoke pytest — pytest documentation
| Python | |
|---|---|
--durations=1� ,即可找到时长最长的1个测试用例
| Python | |
|---|---|

pytest扩展
覆盖率 pytest-cov
pytest-cov是一个集成了Python覆盖率工具coverage.py的pytest插件,通过如下增加如下参数在pytest调用
| Bash | |
|---|---|
htmlcov 文件夹中,本地打开如下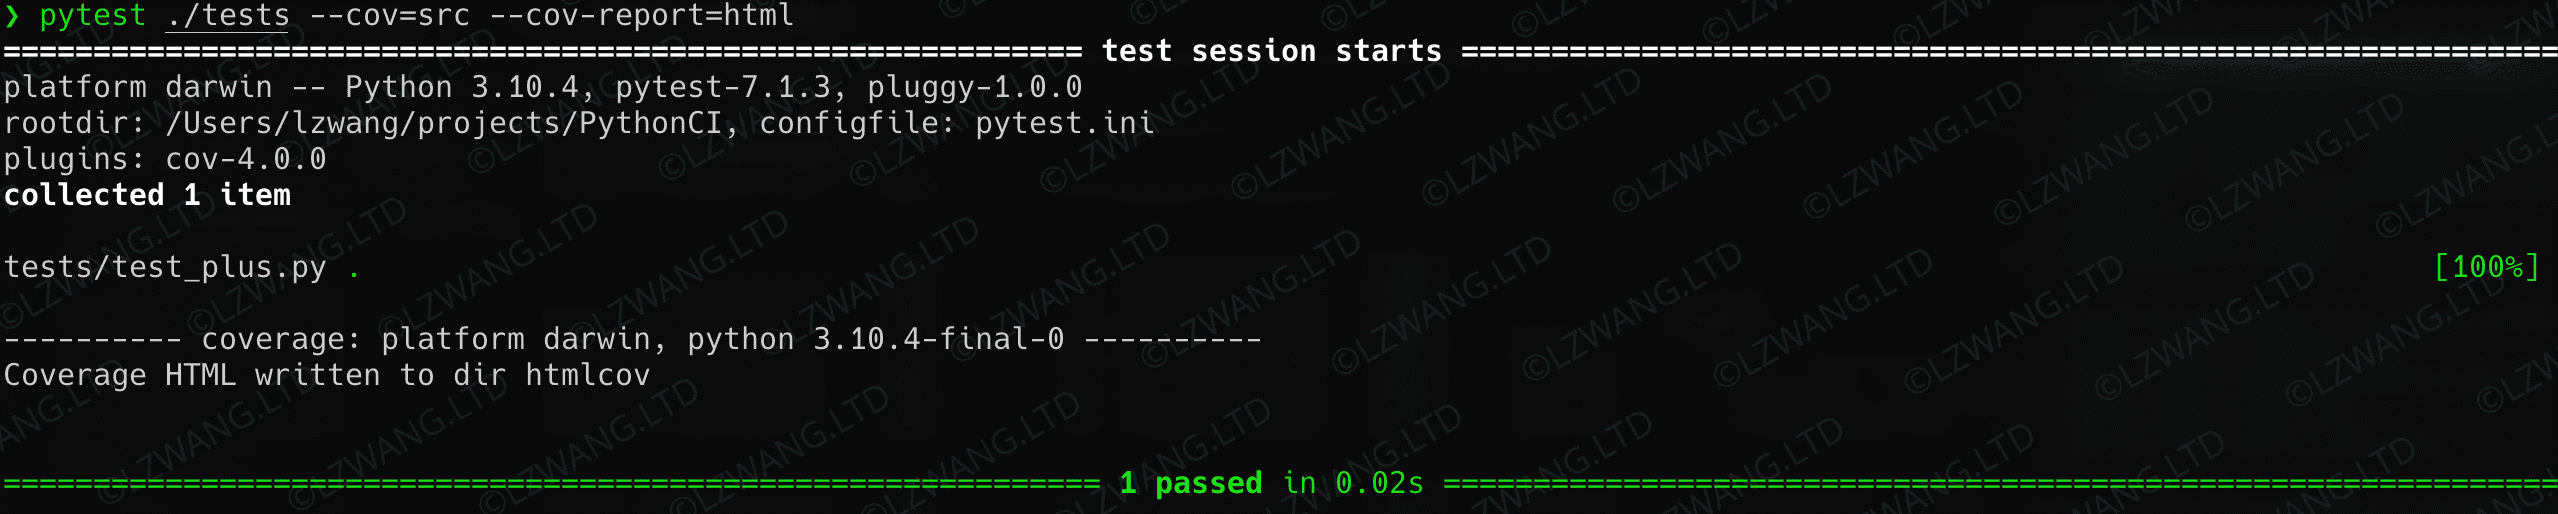
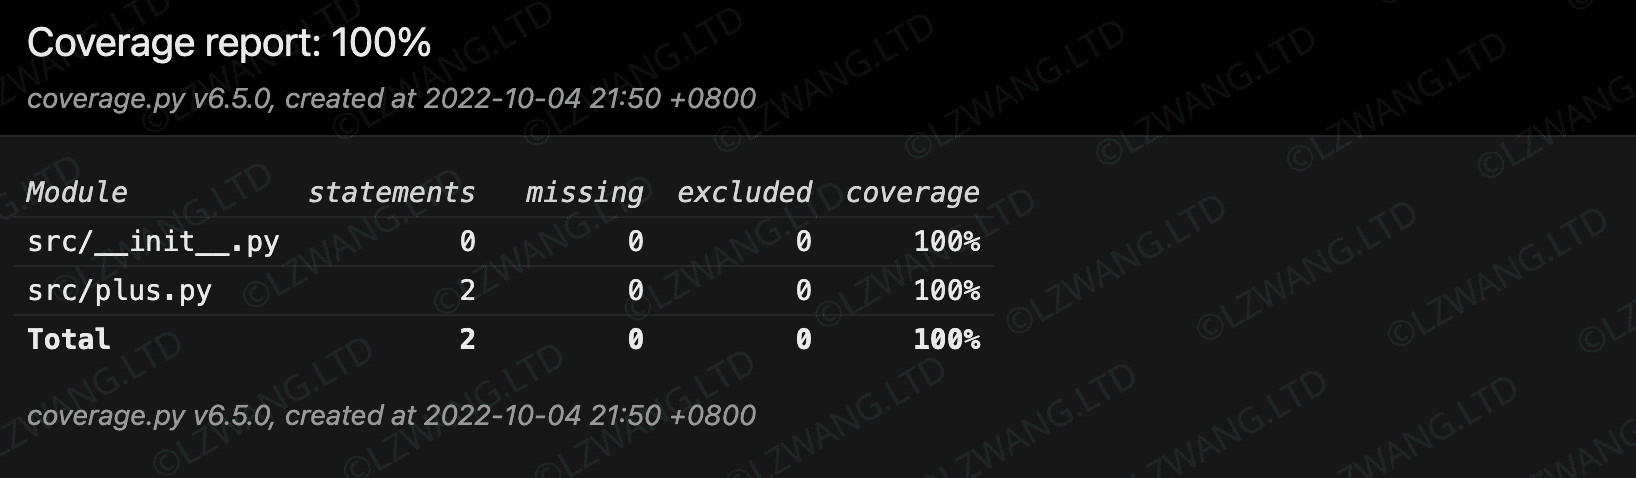
关于Python测试覆盖率模块
coverage.py 的使用,参考官方文档 Coverage.py — Coverage.py 6.5.0 documentation
随机化 pytest-randomly
单元测试之间应该是相互独立的,彼此解藕的。因此一个测试用例的正确性不能依赖其他测试用例,pytest-randomly就是专门为了乱序执行测试用例而编写的pytest插件。基本使用方法如下,只需要指定随机种子即可
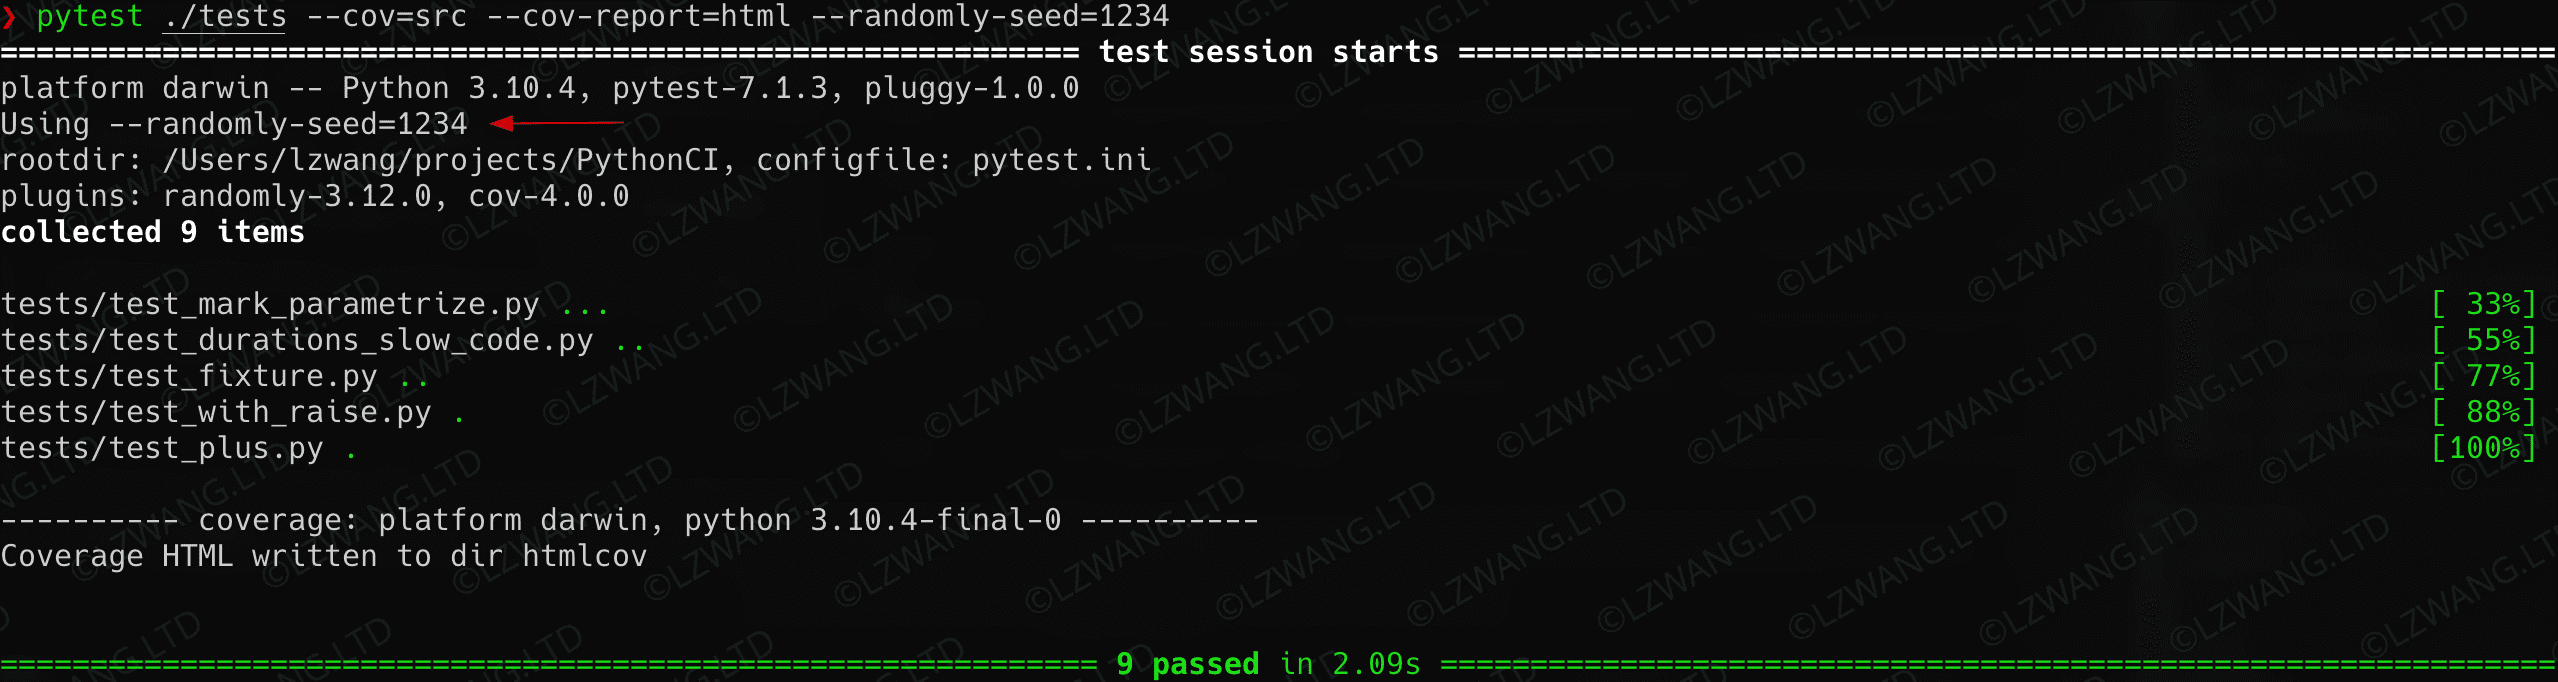
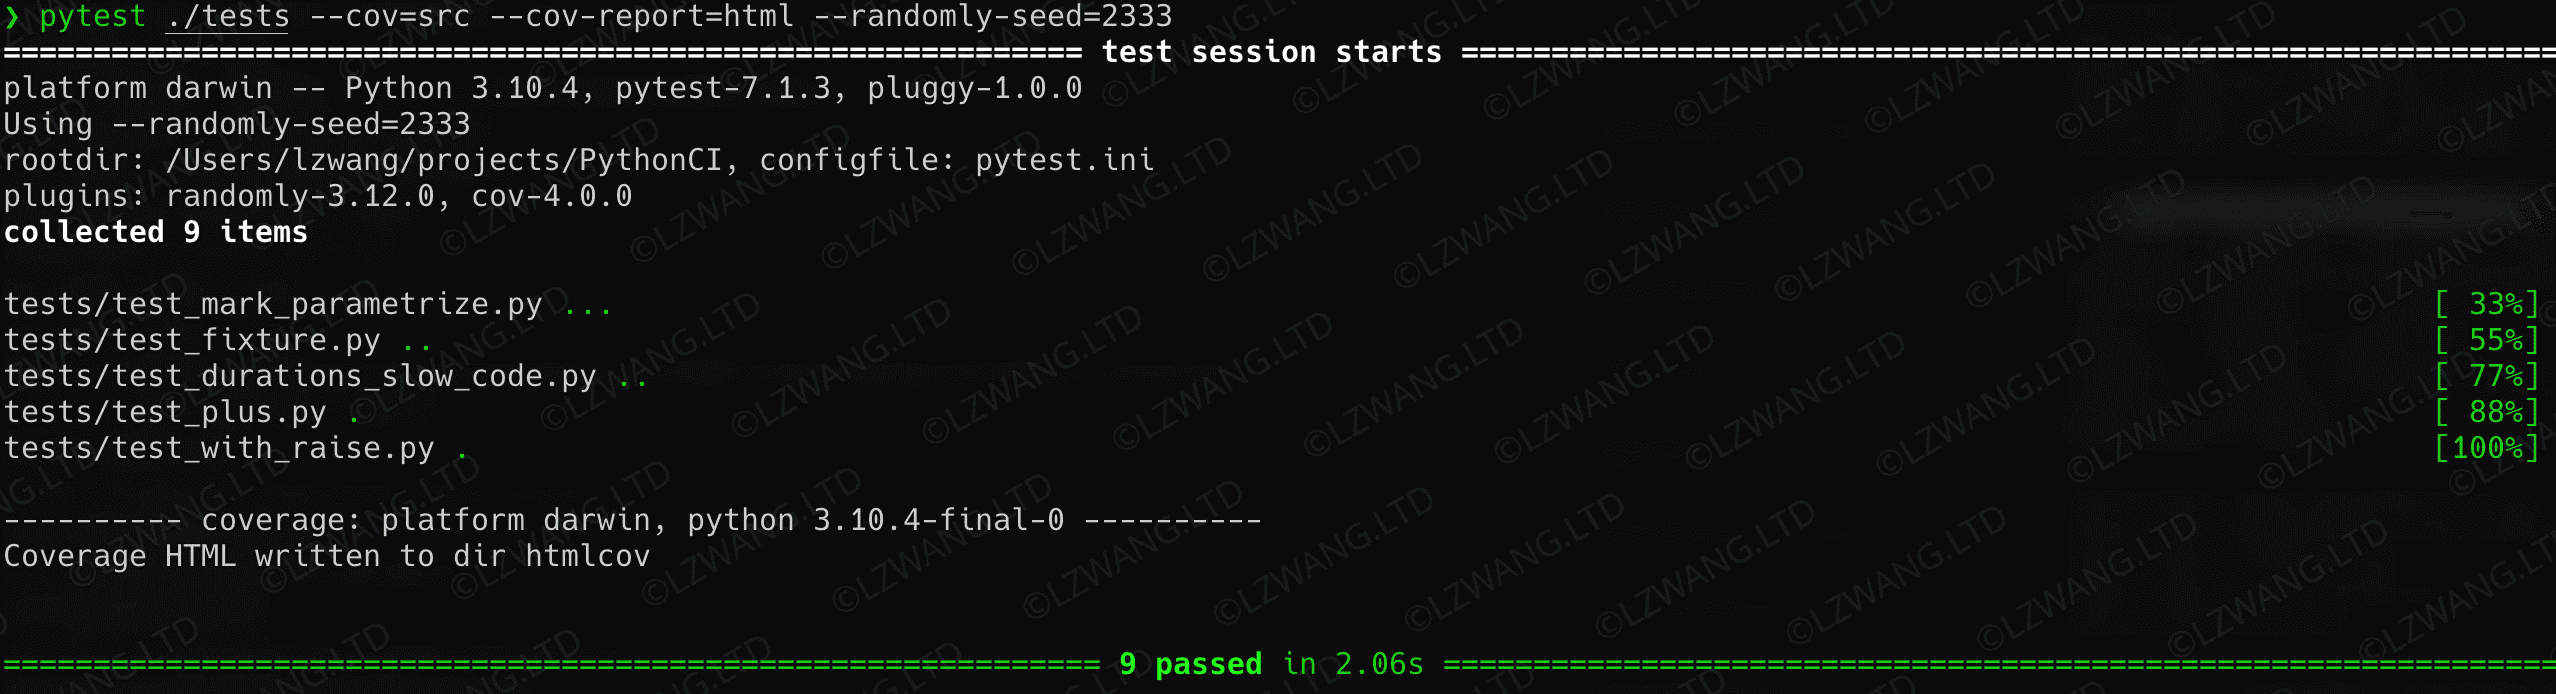
可以看到不同的种子对于测试用例的执行顺序是有影响的。
此插件的详细说明参考 pytest-dev/pytest-randomly: Pytest plugin to randomly order tests and control random.seed
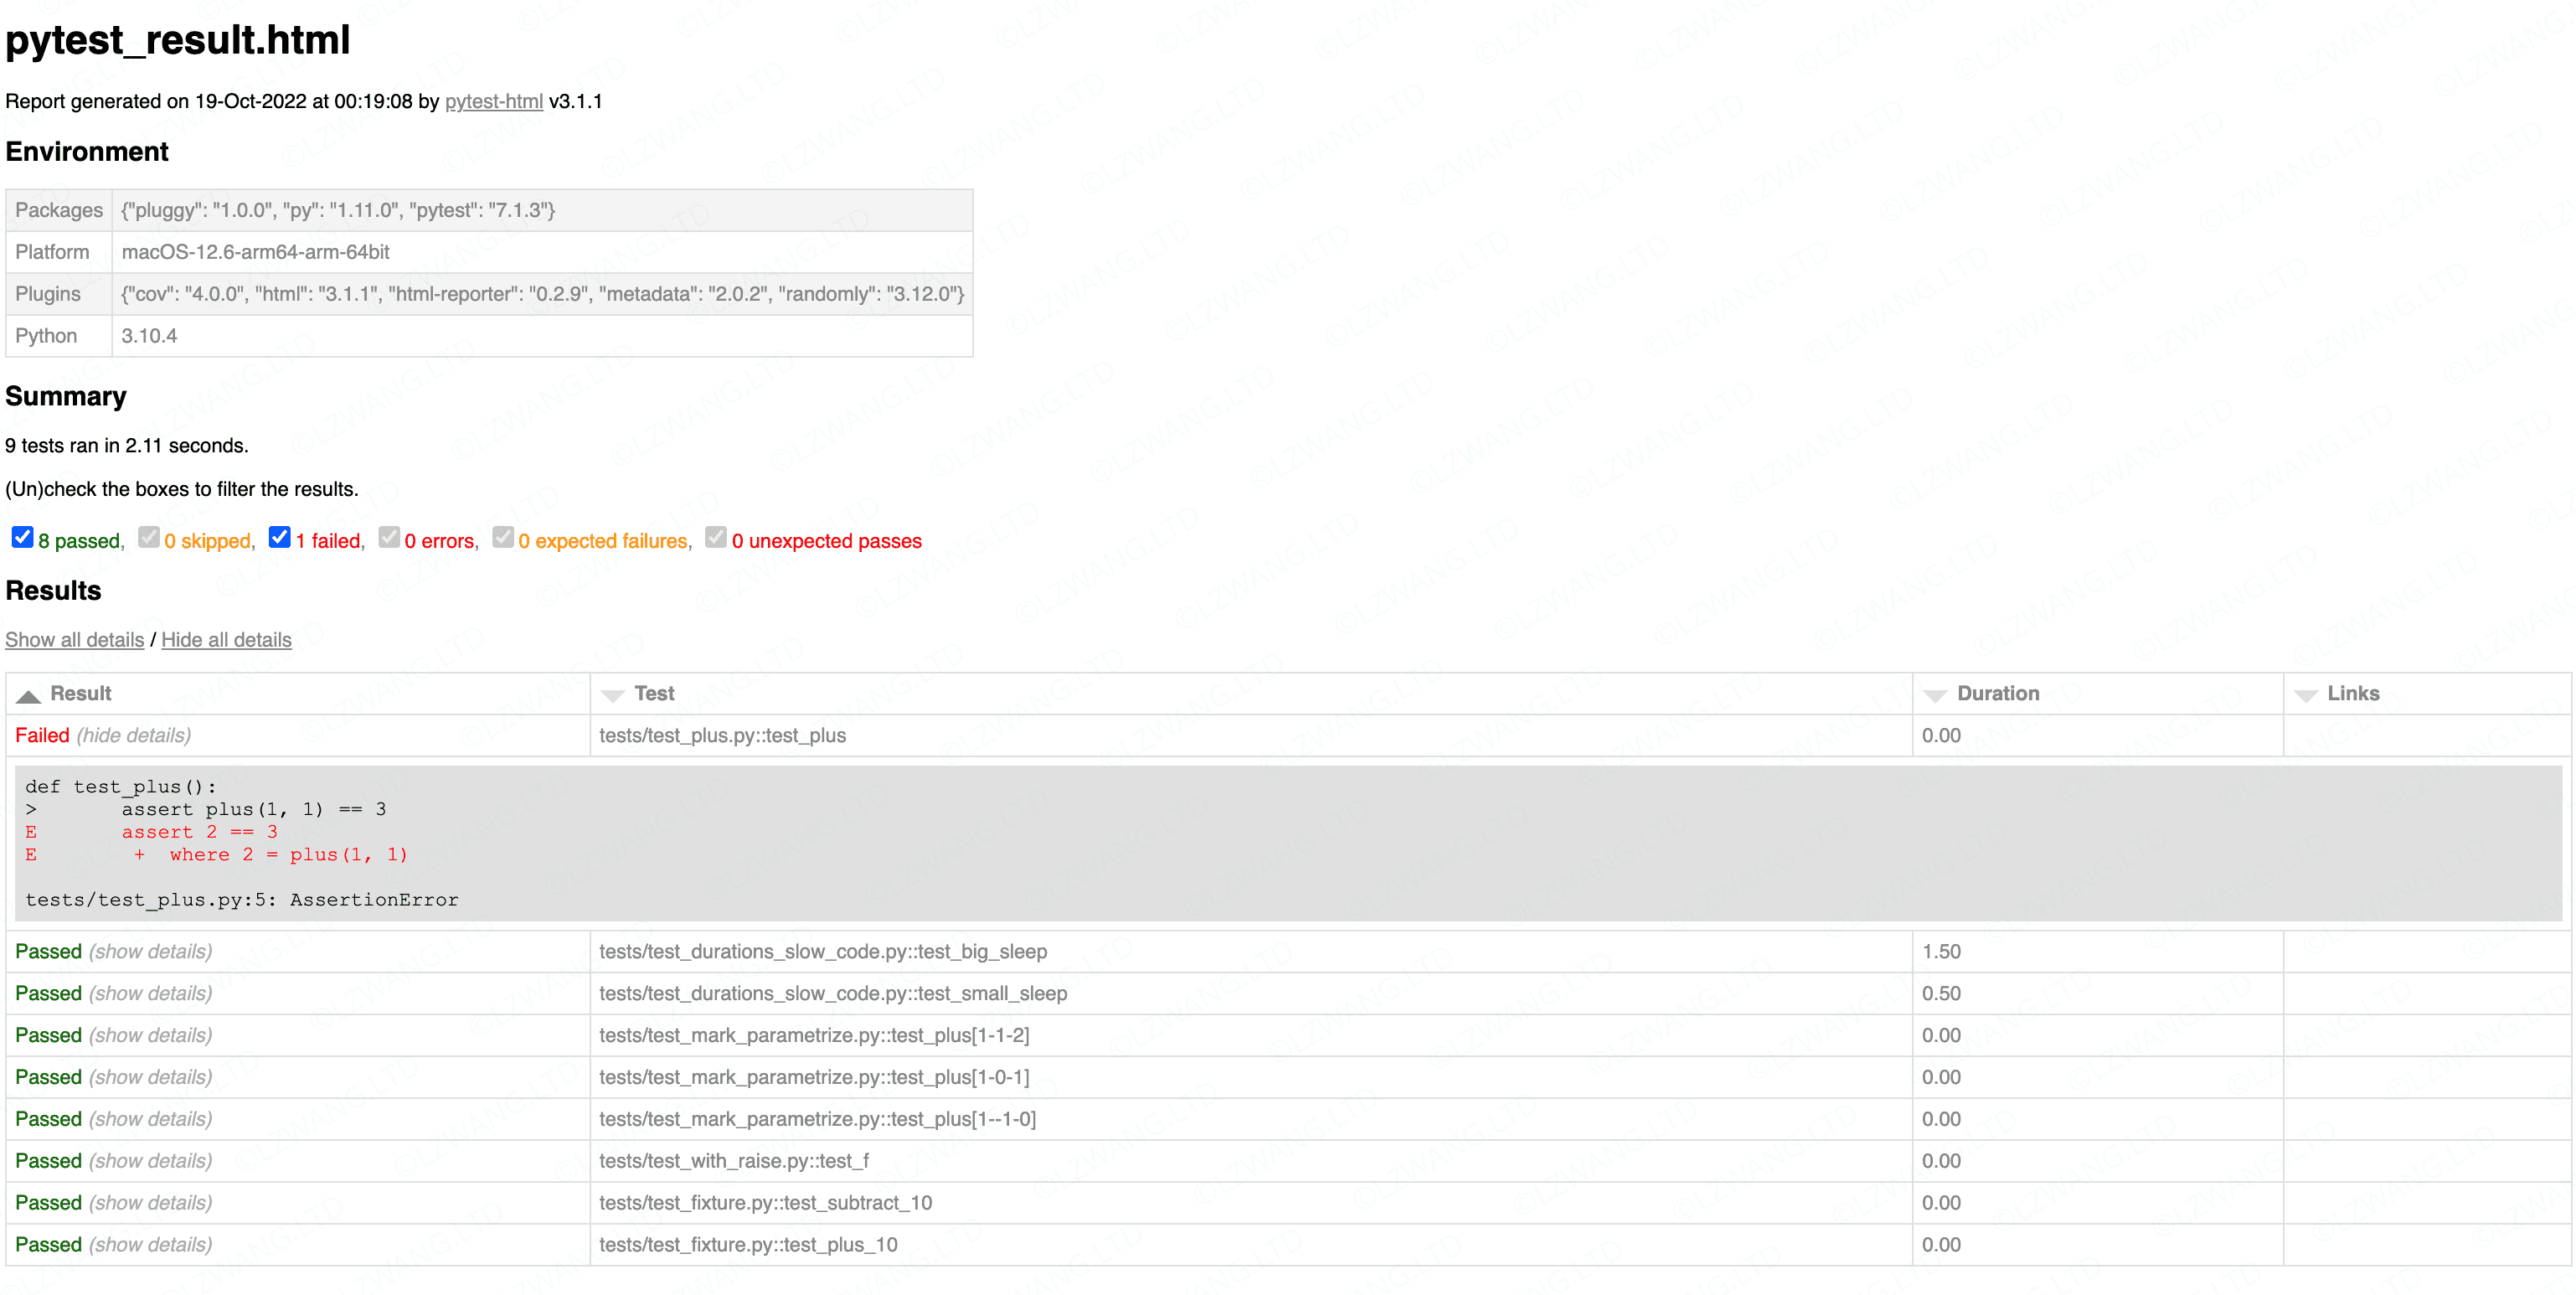
测试报告 pytest-html
此插件将测试结果呈现到html文件中,详细参考 pytest-html — pytest-html documentation
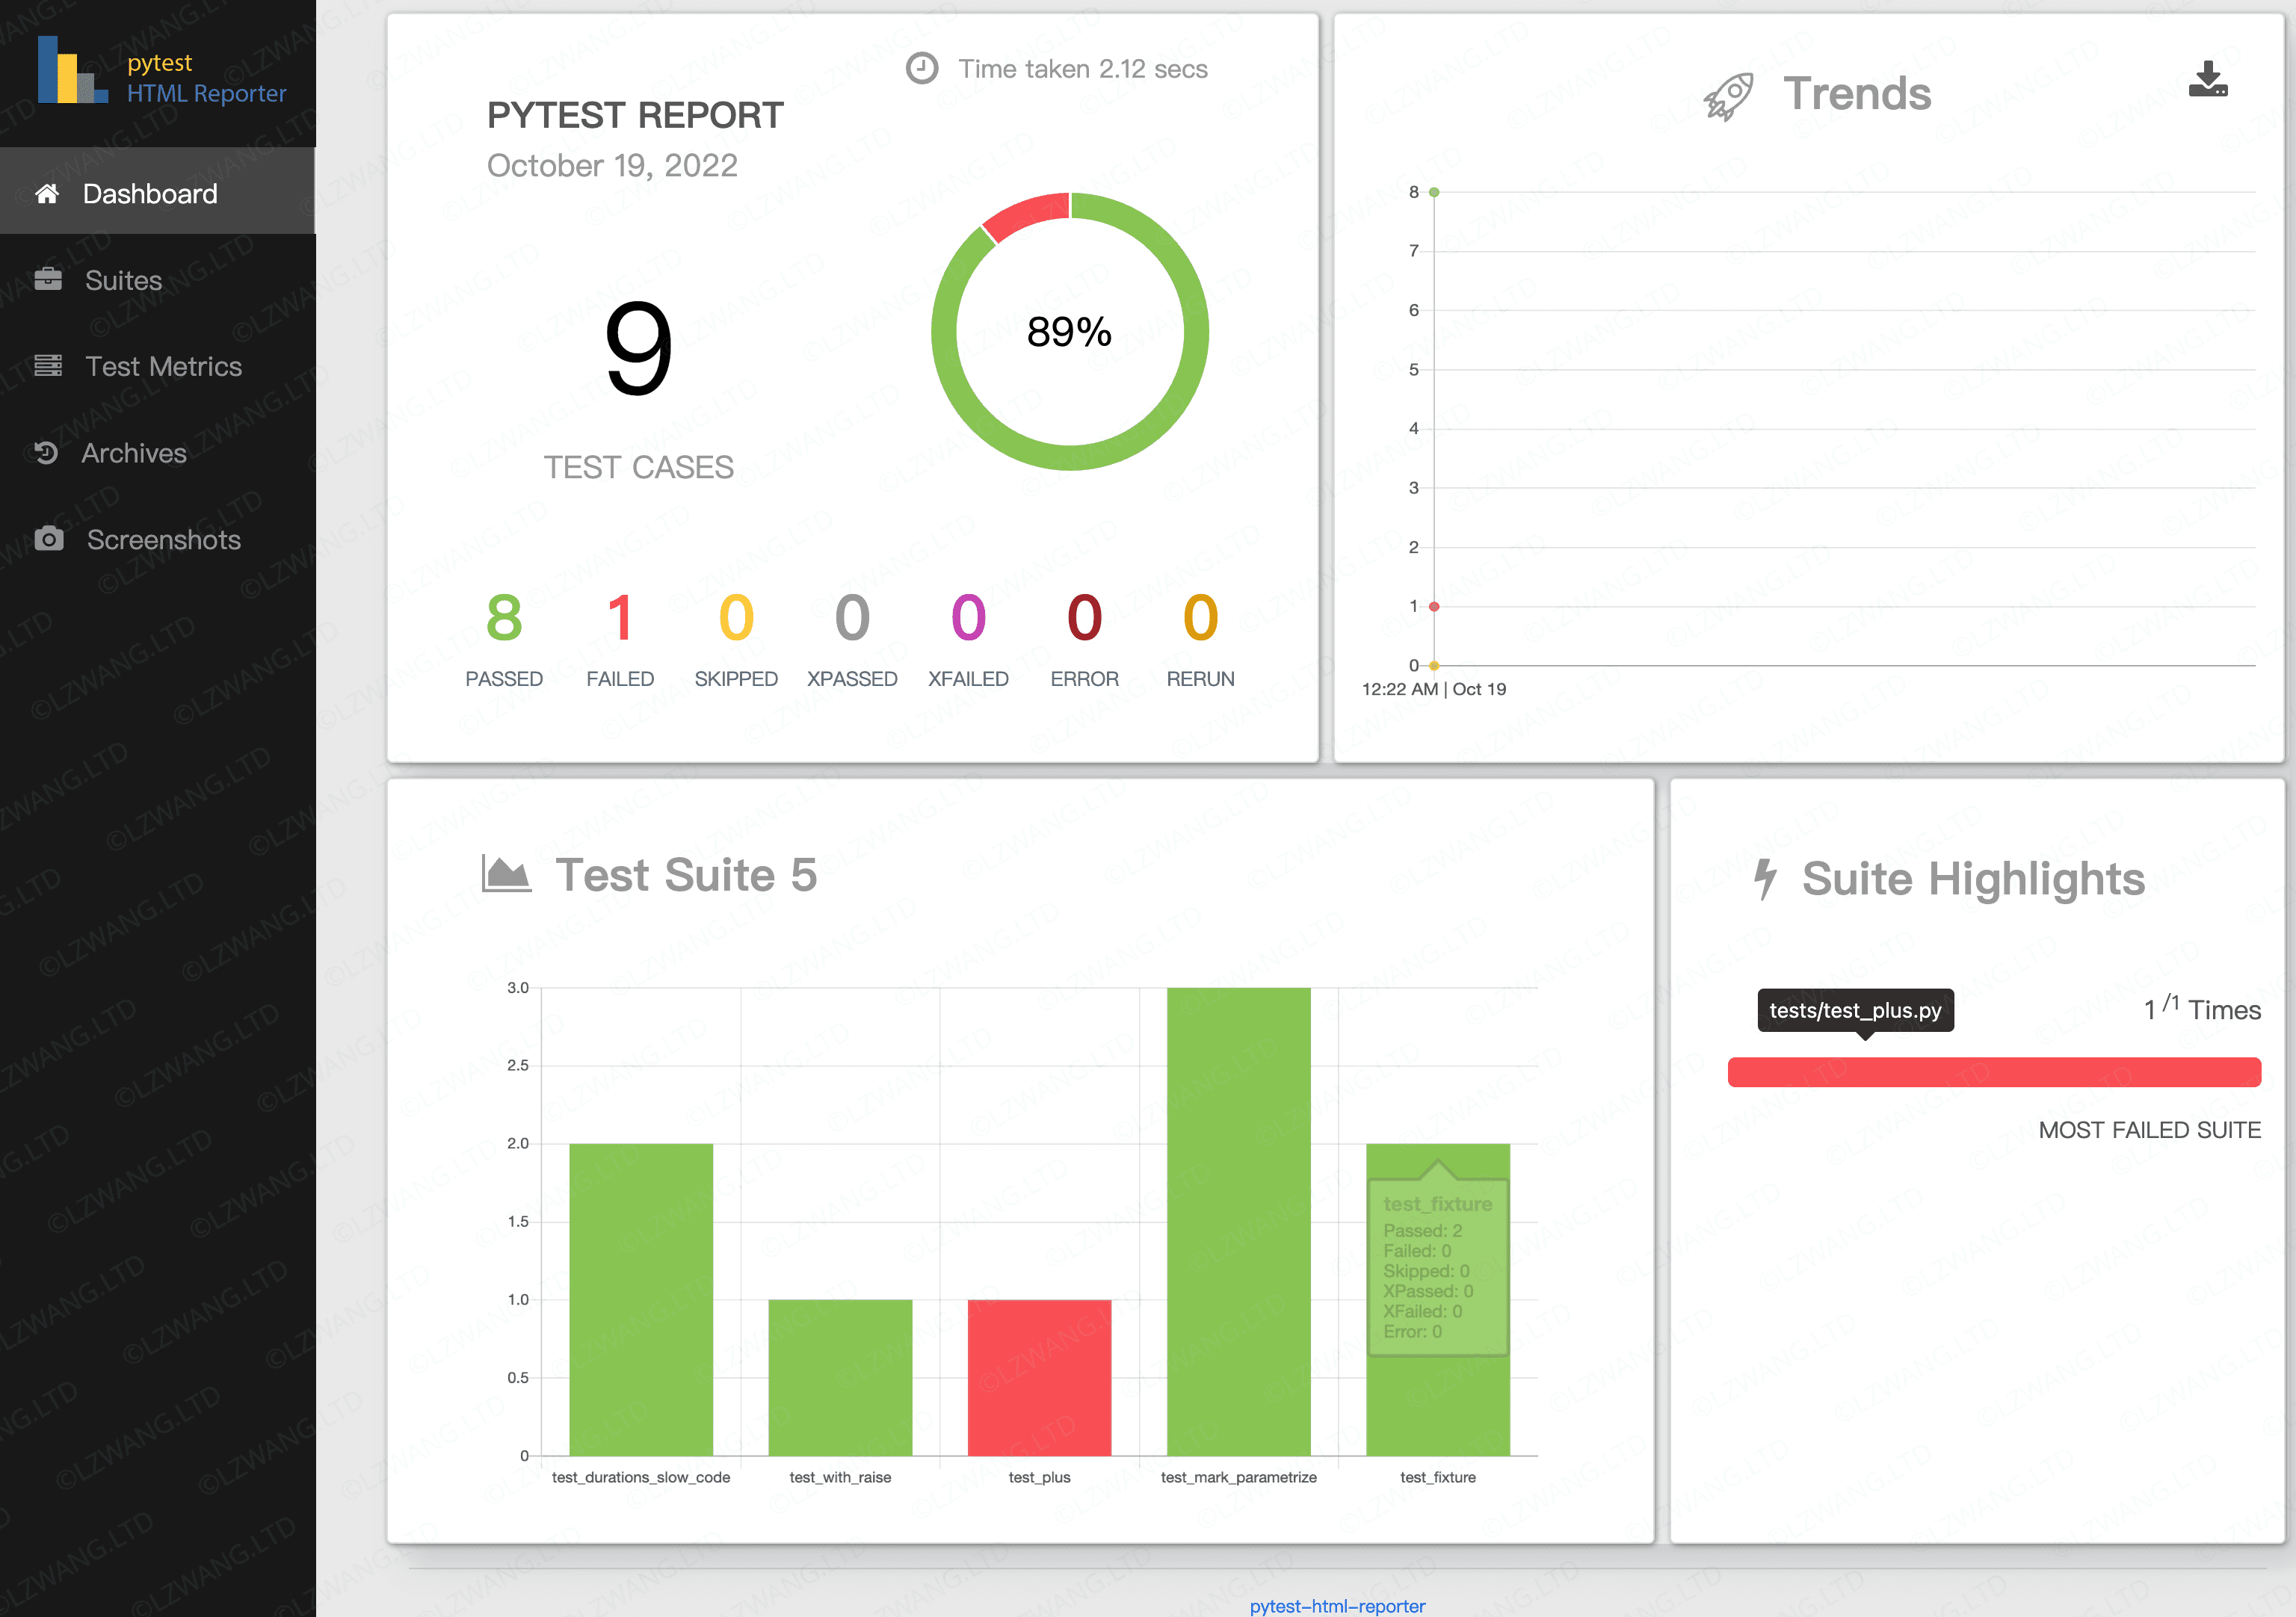
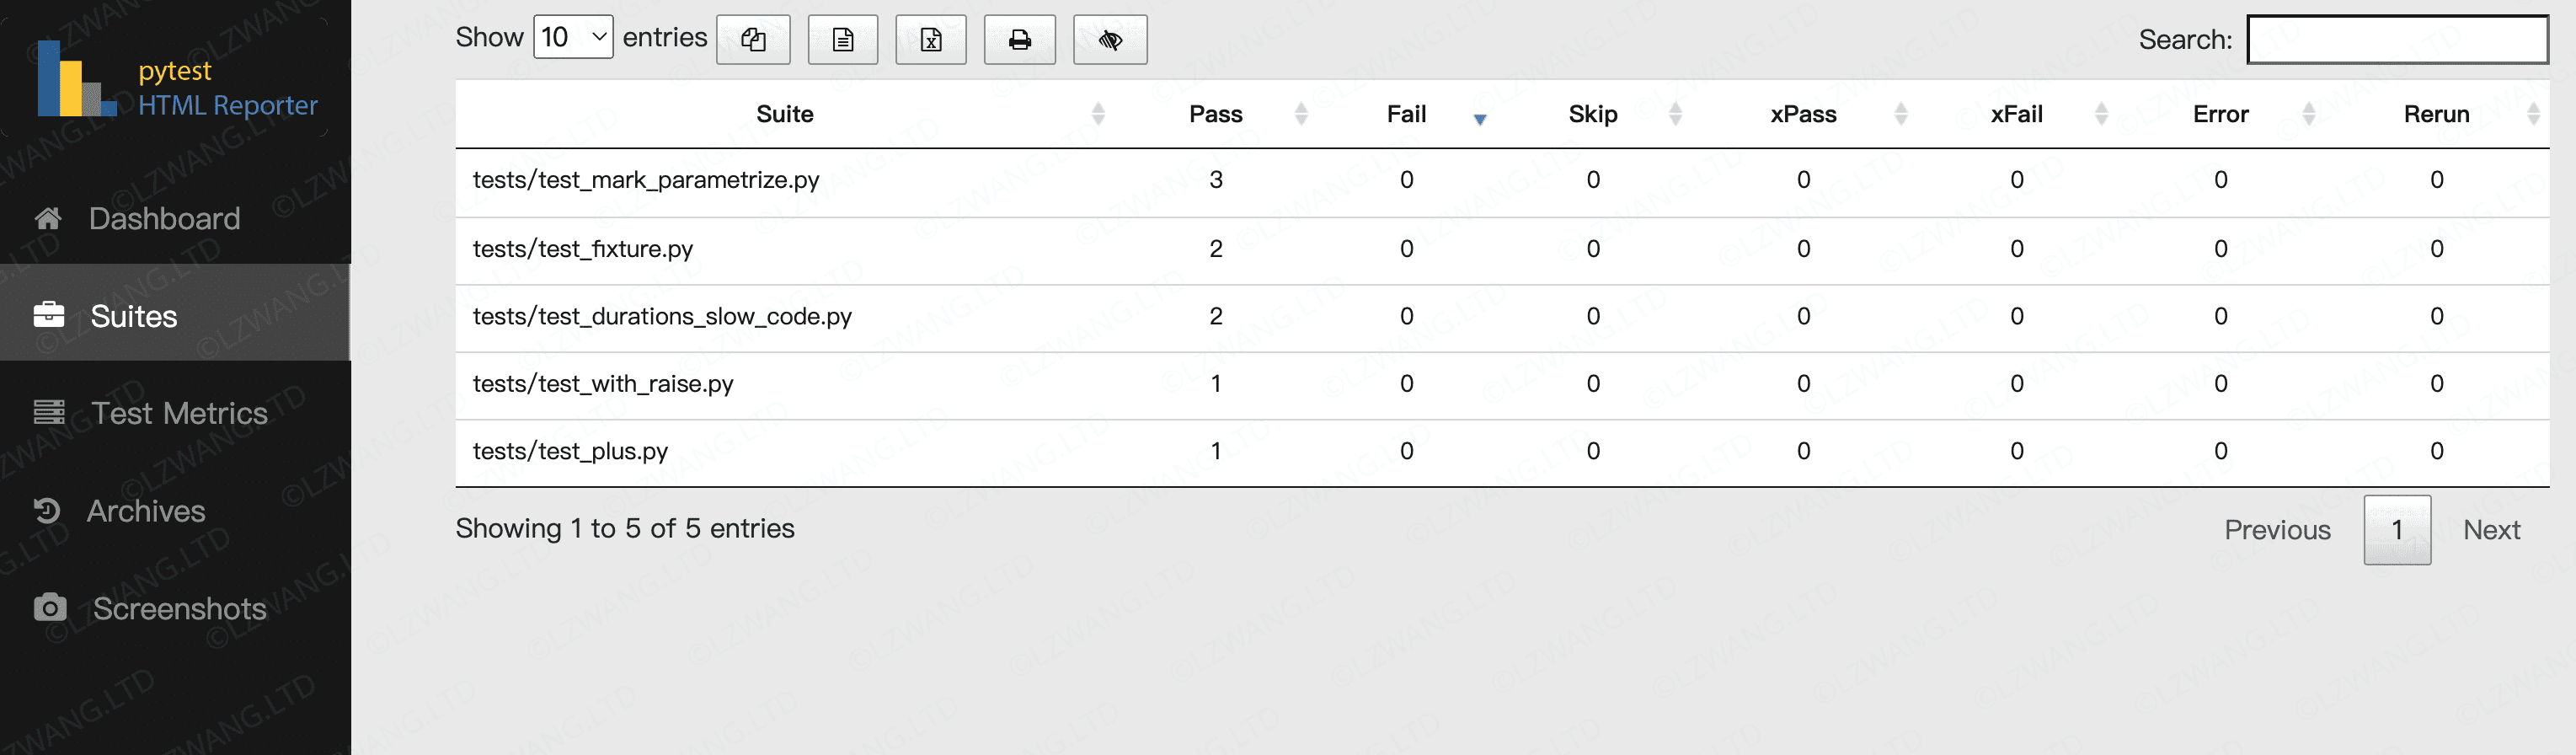
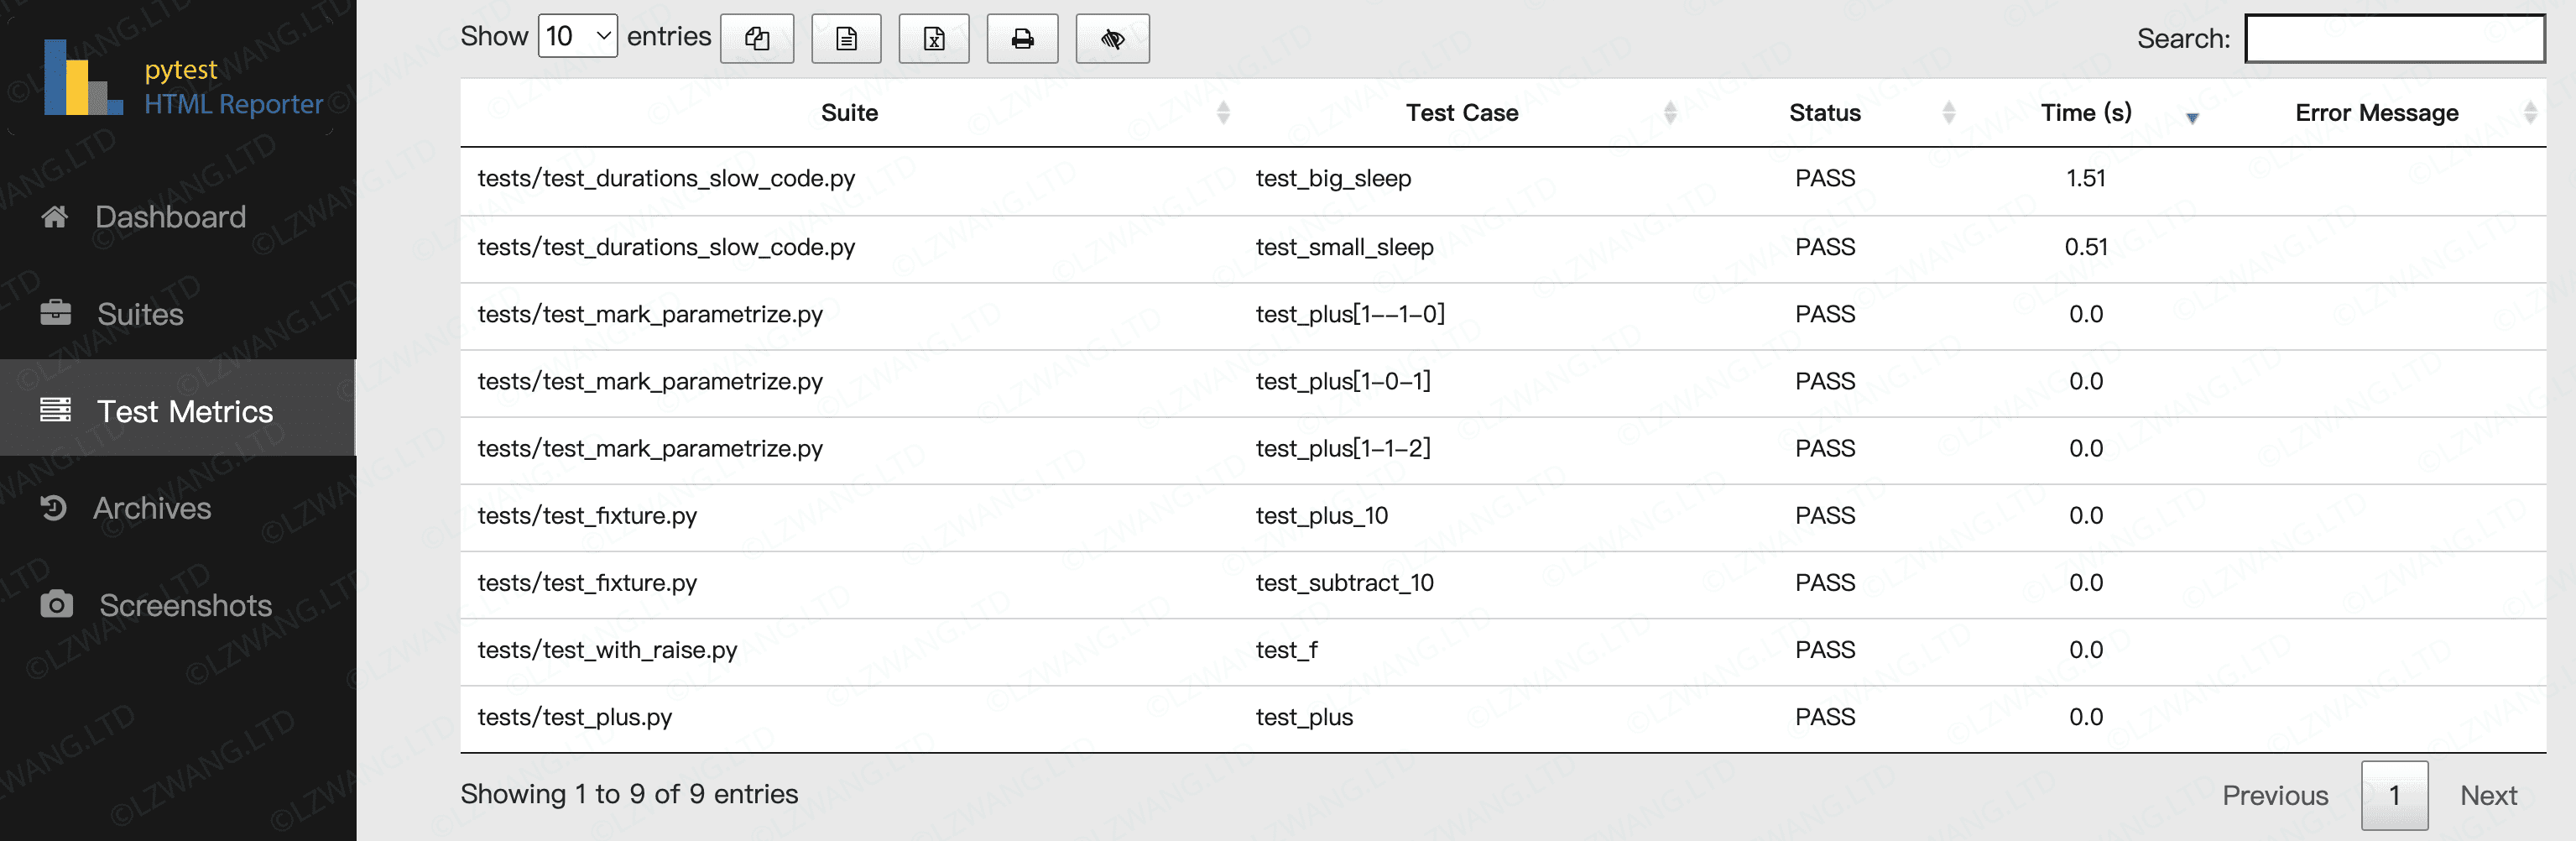
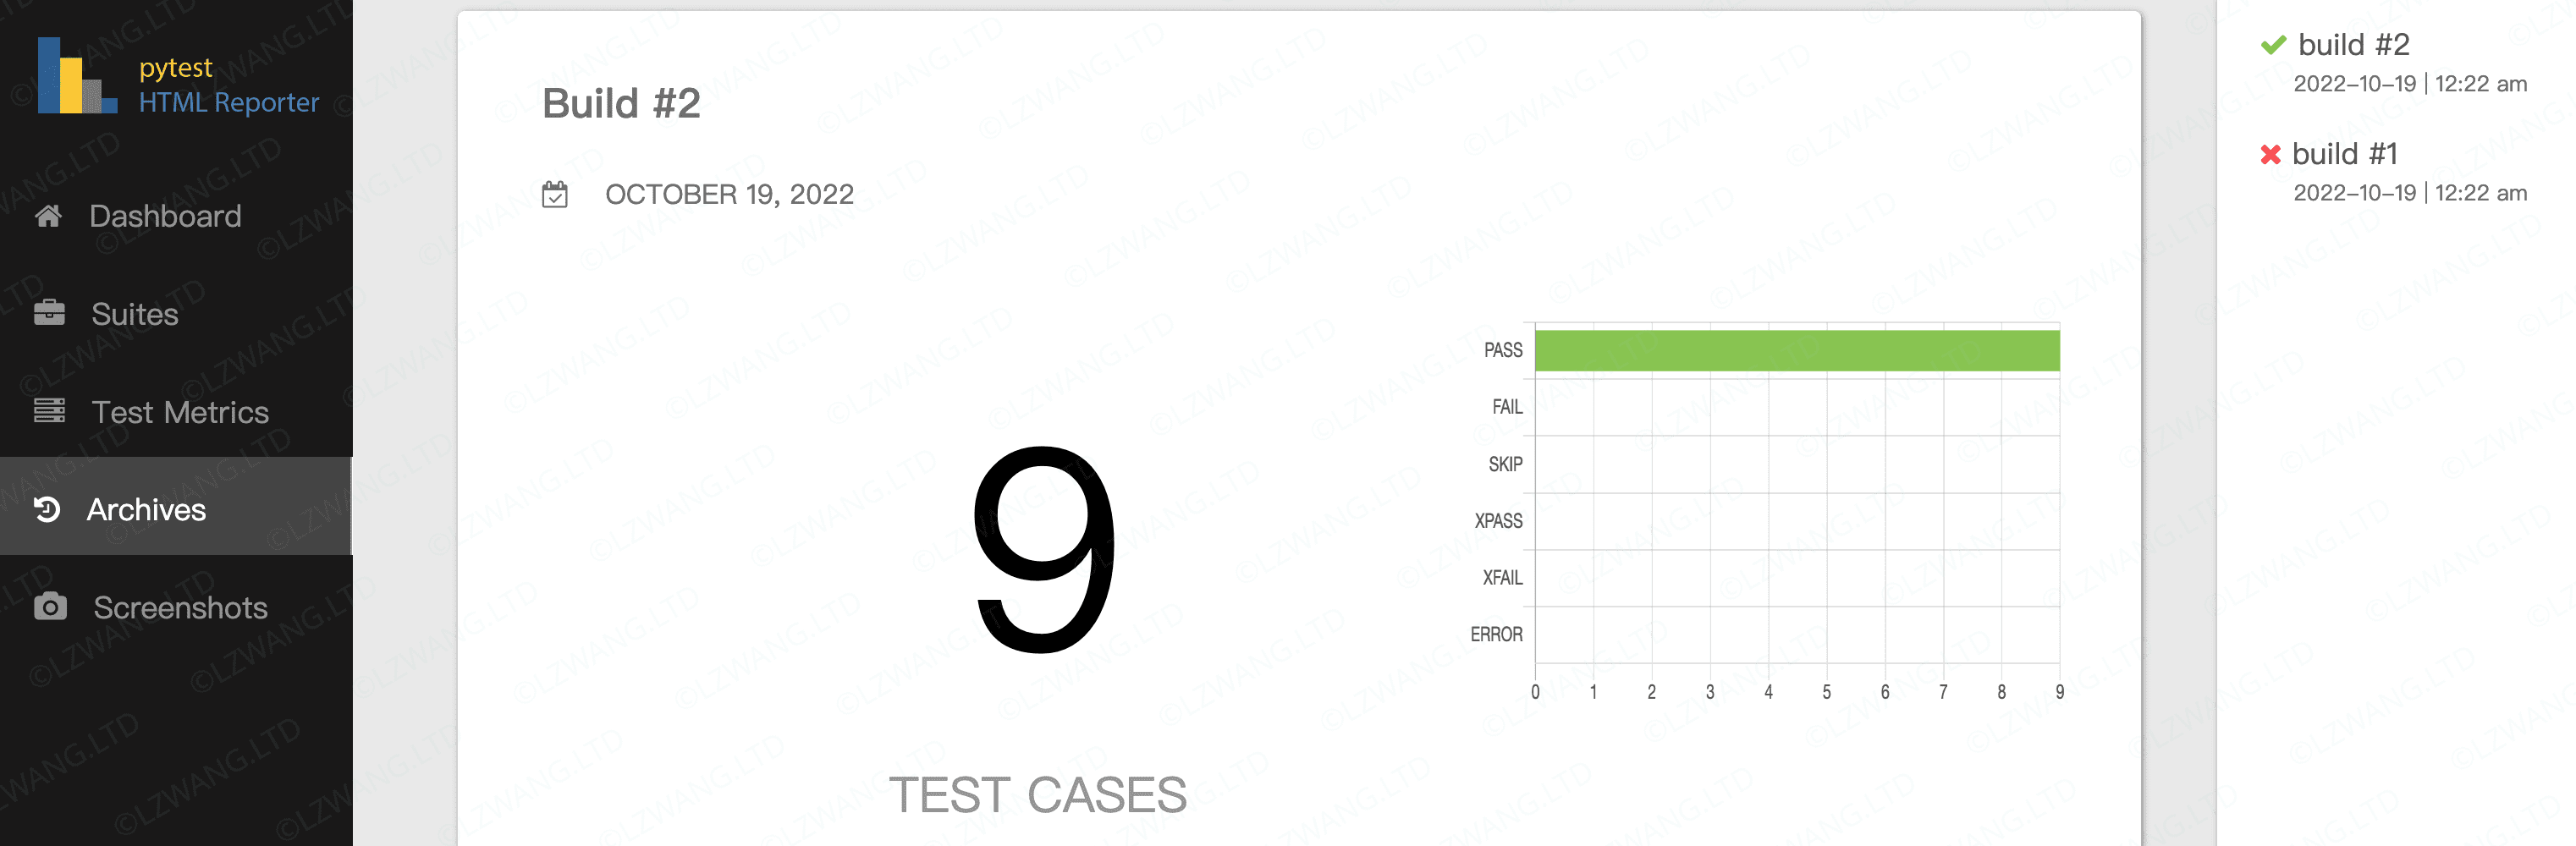
测试看板 pytest-html-reporter
与上面的插件类似,但此插件旨在将pytest结果数据呈现到看板中,包括历史数据,可视化效果更好,详细参考 prashanth-sams/pytest-html-reporter: Generates a static html report based on pytest framework
| Bash | |
|---|---|

pytest实践
mock
- pytest: How to mock in Python – Chang Hsin Lee – Committing my thoughts to words.
- python - How to check if a function was called in a unit test using pytest-mock? - Stack Overflow
参考
- Effective Python Testing With Pytest – Real Python
- Arrange-Act-Assert: A Pattern for Writing Good Tests | Automation Panda
- Full pytest documentation — pytest documentation
- API Reference — pytest documentation
- Welcome to pytest-cov’s documentation! — pytest-cov 4.0.0 documentation
- Coverage.py — Coverage.py 6.5.0 documentation
- Welcome to the tox automation project — tox 3.26.1.dev6 documentation
- pytest-dev/pytest-randomly: Pytest plugin to randomly order tests and control random.seed
- pytest-dev/pytest-html: Plugin for generating HTML reports for pytest results
- prashanth-sams/pytest-html-reporter: Generates a static html report based on pytest framework
- DahlitzFlorian/pytest-loguru-support-video-snippets: Supporting material for the video "How to Add Loguru Support to Pytest in Python" published on my YouTube channel.