schedule 管理定时任务
概要: 本文介绍如何使用schedule模块轻松完成定时任务的管理
创建时间: 2022.10.05 23:24:51
更新时间: 2023.07.28 22:41:26
安装schedule
基本使用
下面的示例给出了几个常见的定时任务执行方式,来源 Example
| Python |
|---|
| import schedule
import time
def job():
print("I'm working...")
# 每间隔10分钟执行一次job
schedule.every(10).minutes.do(job)
# 每小时的 __:00:00 执行一次job
schedule.every().hour.do(job)
# 每天的 10:30:00 执行一次job
schedule.every().day.at("10:30").do(job)
# 每周一的 00:00:00 执行一次job
schedule.every().monday.do(job)
# 每周二的 13:15:00 执行一次job
schedule.every().wednesday.at("13:15").do(job)
# 每分钟的第17秒执行一次job
schedule.every().minute.at(":17").do(job)
while True:
schedule.run_pending()
time.sleep(1)
|
- 如果需要每分钟/小时/天等1个单位周期开始执行job,语法为
schedule.every().unit.do(job),注意此处的时间单位为单数,即 second, minute, hour, day, week, monday, tuesday, wednesday, thursday, friday, saturday, sunday
- 如果需要在固定的几时几分执行job,语法为
schedule.every(X).units.do(job),注意此处的时间单位为复数,即 seconds, minutes, hours, days, weeks
- 如果需要在具体的几分几秒执行job,则需要在上面1和2两种语法后加入
at(HH:MM(:SS)?)天级单位,at((MM)?:SS)小时级单位,at(:SS)分钟级单位,其中的问号表示此单位可选,默认为0
更详细的例子参考 官方文档
任务调度
以下示例均来源于 Examples — schedule 1.1.0 documentation,稍有改动
利用装饰器定时执行任务
需要使用 schedule 提供的 @repeat() 装饰器修饰指定方法即可
| Python |
|---|
| from schedule import every, repeat, run_pending
import time
@repeat(every(5).seconds)
def job():
print(f"({time.asctime()}) I am a scheduled job")
while True:
run_pending()
time.sleep(1)
|

在定时任务中解析任务参数
在第一部分介绍基本用法时,do() 方法接收来自任务 job 的参数
| Python |
|---|
| import time
import schedule
def greet(name):
print(f"({time.asctime()}) Hello", name)
schedule.every(1).seconds.do(greet, name='Alice')
schedule.every(3).seconds.do(greet, name='Bob')
while True:
schedule.run_pending()
time.sleep(0.01)
|

或者使用上面提到的装饰器 repeat() 方法
| Python |
|---|
| import time
from schedule import repeat, every, run_pending
@repeat(every().second, "World")
@repeat(every().day, "Mars")
def hello(planet):
print(f"({time.asctime()}) Hello", planet)
while True:
run_pending()
time.sleep(0.01)
|
取消任务
如果需要取消任务,那么在调度中直接使用 cancel_job() 将此job实例取消即可
| Python |
|---|
| import schedule
def some_task():
print('Hello world')
job = schedule.every().day.at('22:30').do(some_task)
schedule.cancel_job(job)
|
只执行一次任务
如果某个任务只需要执行一次,那么在此job调用的方法中返回 schedule.CancelJob 即可
| Python |
|---|
| import time
import schedule
def job_that_executes_once():
# Do some work that only needs to happen once...
print('Job run once')
return schedule.CancelJob
schedule.every(3).seconds.do(job_that_executes_once)
while True:
schedule.run_pending()
time.sleep(1)
|
获取全部定时任务
调用 schedule.get_jobs() 方法即可
| Python |
|---|
| import schedule
def hello():
print('Hello world')
schedule.every().second.do(hello)
all_jobs = schedule.get_jobs()
|

取消全部定时任务
调用 schedule.clear() 方法即可
| Python |
|---|
| import schedule
def greet(name):
print('Hello {}'.format(name))
schedule.every().second.do(greet)
schedule.clear()
|
利用标签取消一组任务
如果定时任务比较多,那么可以使用标签tag进行分组管理,下面的示例给出了如何取消某个标签下的所有任务
| Python |
|---|
| import schedule
def greet(name):
print('Hello {}'.format(name))
schedule.every().day.do(greet, 'Andrea').tag('daily-tasks', 'friend')
schedule.every().hour.do(greet, 'John').tag('hourly-tasks', 'friend')
schedule.every().hour.do(greet, 'Monica').tag('hourly-tasks', 'customer')
schedule.every().day.do(greet, 'Derek').tag('daily-tasks', 'guest')
jobs_before = schedule.get_jobs()
schedule.clear('daily-tasks')
jobs_after = schedule.get_jobs()
|

在指定随机时间范围内执行任务
使用 to 语法,可以让定时任务在一个时间范围内,随机时间执行
| Python |
|---|
| import time
import schedule
def my_job():
print(f'{time.asctime()} --> Foo')
# Run every 1 to 5 seconds.
schedule.every(1).to(5).seconds.do(my_job)
while True:
schedule.run_pending()
time.sleep(1)
|

为定时任务设置截止日期时间
使用 until 语法,可以将定时任务在某个时间后停止
| Python |
|---|
| import schedule
from datetime import datetime, timedelta, time
def job():
print('Boo')
# run job until a 18:30 today
schedule.every(1).hours.until("18:30").do(job)
# run job until a 2030-01-01 18:33 today
schedule.every(1).hours.until("2030-01-01 18:33").do(job)
# Schedule a job to run for the next 8 hours
schedule.every(1).hours.until(timedelta(hours=8)).do(job)
# Run my_job until today 11:33:42
schedule.every(1).hours.until(time(11, 33, 42)).do(job)
# run job until a specific datetime
schedule.every(1).hours.until(datetime(2020, 5, 17, 11, 36, 20)).do(job)
|
获取到下次执行定时任务还有多长时间
使用 schedule.idle_seconds() 方法可以获取到执行下一个任务还有多少秒,如果返回值为 None ,表示当前没有定时任务
提示
使用此种方法调度任务,可以有效避免 while 循环带来的多次遍历检查待运行任务。且多个定时任务之间不会影响,可以在一定程度上提高性能和稳定性。
| Python |
|---|
| import schedule
import time
def job1():
print(f'{time.asctime()} -->Job 1')
def job2():
print(f'{time.asctime()} -->Job 2')
schedule.every(3).seconds.do(job1)
schedule.every(5).seconds.do(job2)
while 1:
n = schedule.idle_seconds()
print(f'{time.asctime()} --> next to run job: {n}s')
if n is None:
# no more jobs
break
elif n > 0:
# sleep exactly the right amount of time
time.sleep(n)
schedule.run_pending()
|

忽略时间表直接执行全部任务
如果需要一次直接执行全部任务,可以调用 schedule.run_all() 方法
| Python |
|---|
| import schedule
def job_1():
print('Foo')
def job_2():
print('Bar')
schedule.every().monday.at("12:40").do(job_1)
schedule.every().tuesday.at("16:40").do(job_2)
schedule.run_all()
# 任务间的间隔
schedule.run_all(delay_seconds=10)
|
高级使用
后台执行
如果想让定时任务在后台执行,必须使用 threading 模块,在不影响主线程的前提下,以子线程的方式运行。
警告
在下面的示例中,后台定时任务以子线程的方式进行启动和执行。首先进行job的注册,然后调用 run_continuously方法,以每 interval 秒一次进行轮询,所以 interval 必须要小于最小的定时任务时长,不然更细时间颗粒度的任务将无法执行。
| Python |
|---|
| import threading
import time
import schedule
def run_continuously(interval=1):
cease_continuous_run = threading.Event()
class ScheduleThread(threading.Thread):
@classmethod
def run(cls):
while not cease_continuous_run.is_set():
schedule.run_pending()
time.sleep(interval)
continuous_thread = ScheduleThread()
continuous_thread.start()
return cease_continuous_run
def background_job():
print('Hello from the background thread')
schedule.every().second.do(background_job)
# Start the background thread
stop_run_continuously = run_continuously()
# Do some other things...
time.sleep(10)
# Stop the background thread
stop_run_continuously.set()
|
并行执行
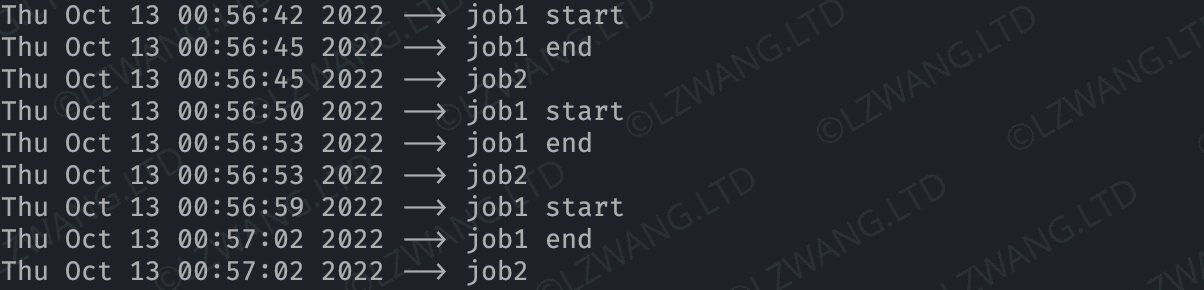
按照第一节的方式,如果有时间间隔相同的定时任务,由于每次调度的job数量为1,所以后面的job总会比前面慢,慢的时长刚好是前个job的执行时长,即在schedule中,任务是串行执行的
| Python |
|---|
| import time
import schedule
def job1():
print(f'{time.asctime()} --> job1 start')
time.sleep(3)
print(f'{time.asctime()} --> job1 end')
def job2():
print(f'{time.asctime()} --> job2')
schedule.every(5).seconds.do(job1)
schedule.every(5).seconds.do(job2)
while True:
time.sleep(1)
schedule.run_pending()
|
如果需要实现真正的并行执行,有两种思路
思路一
借助 threading 模块,将多个任务拆分到不同的线程中封装,互不干扰
| Python |
|---|
| import time
import threading
import schedule
def job1():
print(f'{time.asctime()} --> job1 start')
time.sleep(3)
print(f'{time.asctime()} --> job1 end')
def job2():
print(f'{time.asctime()} --> job2')
def run_threaded(job_func):
job_thread = threading.Thread(target=job_func)
job_thread.start()
schedule.every(5).seconds.do(run_threaded, job1)
schedule.every(5).seconds.do(run_threaded, job2)
while True:
time.sleep(1)
schedule.run_pending()
|

思路二
使用Python队列,可以进行更细粒度的控制
| Python |
|---|
| import time
import threading
import queue
import schedule
def job1():
print(f'{time.asctime()} --> job1 start')
time.sleep(3)
print(f'{time.asctime()} --> job1 end')
def job2():
print(f'{time.asctime()} --> job2')
job_queue = queue.Queue()
def worker_main():
while 1:
job_func = job_queue.get()
job_func()
job_queue.task_done()
schedule.every(5).seconds.do(job_queue.put, job1)
schedule.every(5).seconds.do(job_queue.put, job2)
worker_thread = threading.Thread(target=worker_main)
worker_thread.start()
while True:
time.sleep(1)
schedule.run_pending()
|

异常处理
schedule不会捕获定时任务执行过程中的异常,但是我们可以通过装饰器为任务捕获异常
| Python |
|---|
| import functools
import traceback
import schedule
def catch_exceptions(cancel_on_failure=False):
def catch_exceptions_decorator(job_func):
@functools.wraps(job_func)
def wrapper(*args, **kwargs):
try:
return job_func(*args, **kwargs)
except Exception as e:
print(f'{job_func} run error: {e}')
print(traceback.format_exc())
if cancel_on_failure:
return schedule.CancelJob
return wrapper
return catch_exceptions_decorator
@catch_exceptions(cancel_on_failure=True)
def bad_task():
return 1 / 0
schedule.every(5).minutes.do(bad_task)
schedule.run_all()
|

日志处理
两种方式
第一种
使用Python的logger模块,调整日志等级至 DEBUG,即可看到原生的 schedule 模块的日志输出
| Python |
|---|
| import schedule
import logging
logging.basicConfig()
schedule_logger = logging.getLogger('schedule')
schedule_logger.setLevel(level=logging.DEBUG)
def job():
print("Hello, Logs")
schedule.every().second.do(job)
schedule.run_all()
schedule.clear()
|

第二种
利用装饰器,将定时任务执行前后的信息进行定向输出
| Python |
|---|
| import functools
import time
import schedule
# This decorator can be applied to any job function to log the elapsed time of each job
def print_elapsed_time(func):
@functools.wraps(func)
def wrapper(*args, **kwargs):
start_timestamp = time.time()
print('LOG: Running job "%s"' % func.__name__)
result = func(*args, **kwargs)
print('LOG: Job "%s" completed in %d seconds' % (
func.__name__, time.time() - start_timestamp))
return result
return wrapper
@print_elapsed_time
def job():
print('Hello, Logs')
time.sleep(5)
schedule.every().second.do(job)
schedule.run_all()
|

多调度器
通过实例化多个 Scheduler() 对象,可以实现多个调度器的控制,且二者不会相互影响
| Python |
|---|
| import time
import schedule
def fooJob():
print("Foo")
def barJob():
print("Bar")
# Create a new scheduler
scheduler1 = schedule.Scheduler()
# Add jobs to the created scheduler
scheduler1.every().hour.do(fooJob)
scheduler1.every().hour.do(barJob)
# Create as many schedulers as you need
scheduler2 = schedule.Scheduler()
scheduler2.every().second.do(fooJob)
scheduler2.every().second.do(barJob)
while True:
# run_pending needs to be called on every scheduler
scheduler1.run_pending()
scheduler2.run_pending()
time.sleep(1)
|
参考